In this post, I’ll help you set up automatic website deployment to free GitHub Pages hosting, using Wercker (also free!).
Recently, my website was down for a few weeks, after I stopped BitBallon subscription. This time I wanted to try one of the free alternatives.
I also wanted to learn something new in the process – that’s why I didn’t want to use GitHub for building my Jekyll blog and that’s how I stumbled upon Wercker.
Build your website
I won’t cover building your website in details here. This is something requiring a separate post, or better, a series of posts, so I hope a website is something you already have.
In my case, I’m using Jekyll with Pixyll theme, with a few minor changes.
If you’re not a fan of Jekyll, here’s a short list of some other frameworks I was considering:
GitHub Pages
To host your website on GitHub pages, the easiets way is to create a repo named YOUR-GITHUB-USERNAME.github.io and store your website on the master branch (you can see mine here).
This is where Wercker will push your website after building it.
Wercker
Build website script
First, prepare a piece of code which you will use to build your website as if you were building it for the first time. It might be only a one-liner, just write it down somewhere as we will use it in a minute.
In my case (using Jekyll) it’s:
bundle install
JEKYLL_ENV=production bundle exec jekyll build --trace
I set jekyll environment variable here, which you might not need. My website behaves differently when it comes to analytics in development/production mode, so before building for deployment, I always switch to production.
Add Wercker app
Create an account on Wercker website. After you create it, it should ask you to create your first app. If it won’t, use this create new app link.
Choose where you keep your website source code (GitHub or BitBucket) and which access configuration you want (I went with the default one).
Click finish (you don’t have to make your app public) and continue to configuring your workflow.
You should end up on Runs tab, which will be asking you to add wercker.yml file to your repo.
Here’s the one I used:
box: ruby
build:
  steps:
    # Go into site folder and install dependencies defined in Gemfile
    - script:
        name: Install bundle
        code: |
          bundle install

    # Set production environment and build
    # Generate the jekyll site with trace information on.
    # And store the result in the $WERCKER_OUTPUT_DIR, the
    # directory that is shared with the deployment pipeline.
    - script:
        name: Build Jekyll Page
        code: |
          JEKYLL_ENV=production bundle exec jekyll build --trace --destination $WERCKER_OUTPUT_DIR

deploy:
  steps:
    - add-ssh-key:
        keyname: SSH_DEPLOY
        host: github.com
    - add-to-known_hosts:
        hostname: github.com
        fingerprint: 16:27:ac:a5:76:28:2d:36:63:1b:56:4d:eb:df:a6:48
    - leipert/git-push@0.7.6:
         host: github.com
         repo: username/username.github.io
         branch: master
         basedir: .
(you can also download the file here)
Wercker configuration
Let’s see how is the wercker.yml config file built.
box: ruby
Box defines the name of the image that will be used for building your website. You can use any Docker image here, I went with standard ruby image.
We have two major steps:
- build
- deploy
They are connected to Pipelines, which you can find in Wercker under Workflows tab.

As you can see on the website, you have only build pipeline in there. Scroll down and click Add new pipeline.
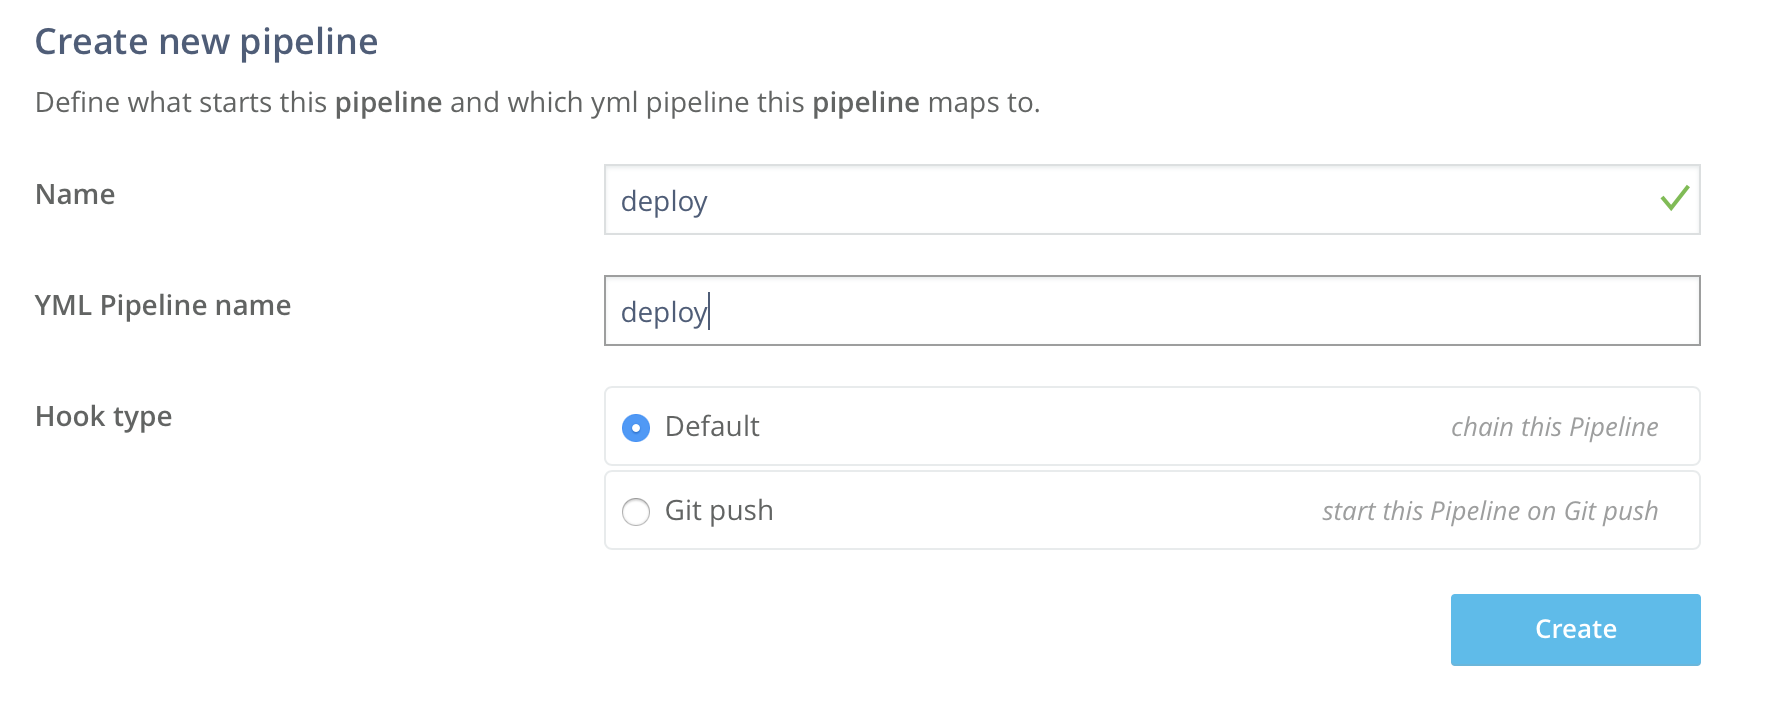
Name– Put here whatever you think best describes deployment phase;YML Pipeline name– This has to be the name of the pipeline as defined inwercker.ymlfile. In the file I provided it’s calleddeployso put the same name in here. If you’d like to name it differently you can do so, just remember to also change pipeline name inymlfile;Hook type– choosedefaultwhich will allow chaining this pipeline afterbuildphase.
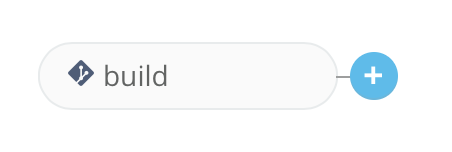
Go back to Workflows tab and click plus button next to the build pipeline in the Editor.
The only thing you should change now is Execute pipeline – click on the field, select deploy and confirm by clicking Add.
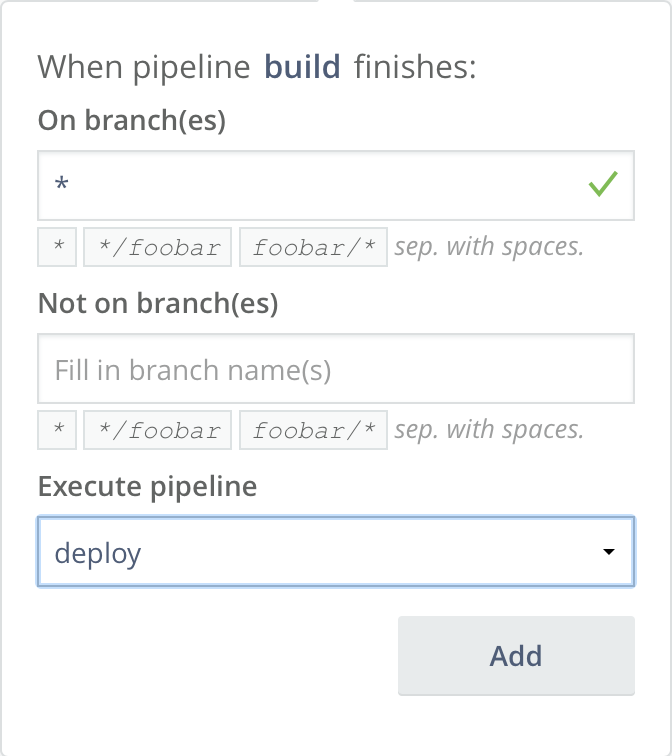
This assures that our website is deployed automatically to GitHub Pages repo after each build.
Build pipeline
(I removed comments from the file below for clarity)
build:
  steps:
    - script:
        name: Install bundle
        code: |
          bundle install

    - script:
        name: Build Jekyll Page
        code: |
          JEKYLL_ENV=production bundle exec jekyll build --trace --destination $WERCKER_OUTPUT_DIR
As you can see, build pipeline steps are quite simple.
We use custom scripts which consist of two parts – script name that will be displayed on Wercker website during each pipeline phase and the code that will be executed.
We have two scripts that could be easily combined into one, but in case of failure you will see what failed faster with separate steps.
I used the script I asked you to prepare before, with just one small change – as a build destination, we use $WERCKER_OUTPUT_DIR, a variable that defines a folder that can be accessed also from deploy pipeline.
If you use anything else than Jekyll – replace jekyll build command with anything else that builds your website. Just remember to use $WERCKER_OUTPUT_DIR as a destination for the build process.
Deploy pipeline
We will start from creating an ssh key for deploying your website to GitHub pages.
Go into Environment tab and click on Generate SSH Key.

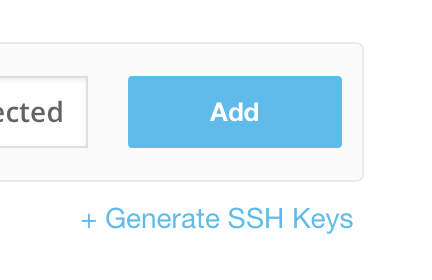
As SSH Key name use SSH_DEPLOY (the same name we used in yml file), and click Generate.

Now you should see two positions under Environment tab:
SSH_DEPLOY_PUBLICSSH_DEPLOY_PRIVATE
Copy value under SSH_DEPLOY_PUBLIC (it starts with ssh-rsa) and go to your GitHub Pages repo prepared before (the one named YOUR-GITHUB-USERNAME.github.io).
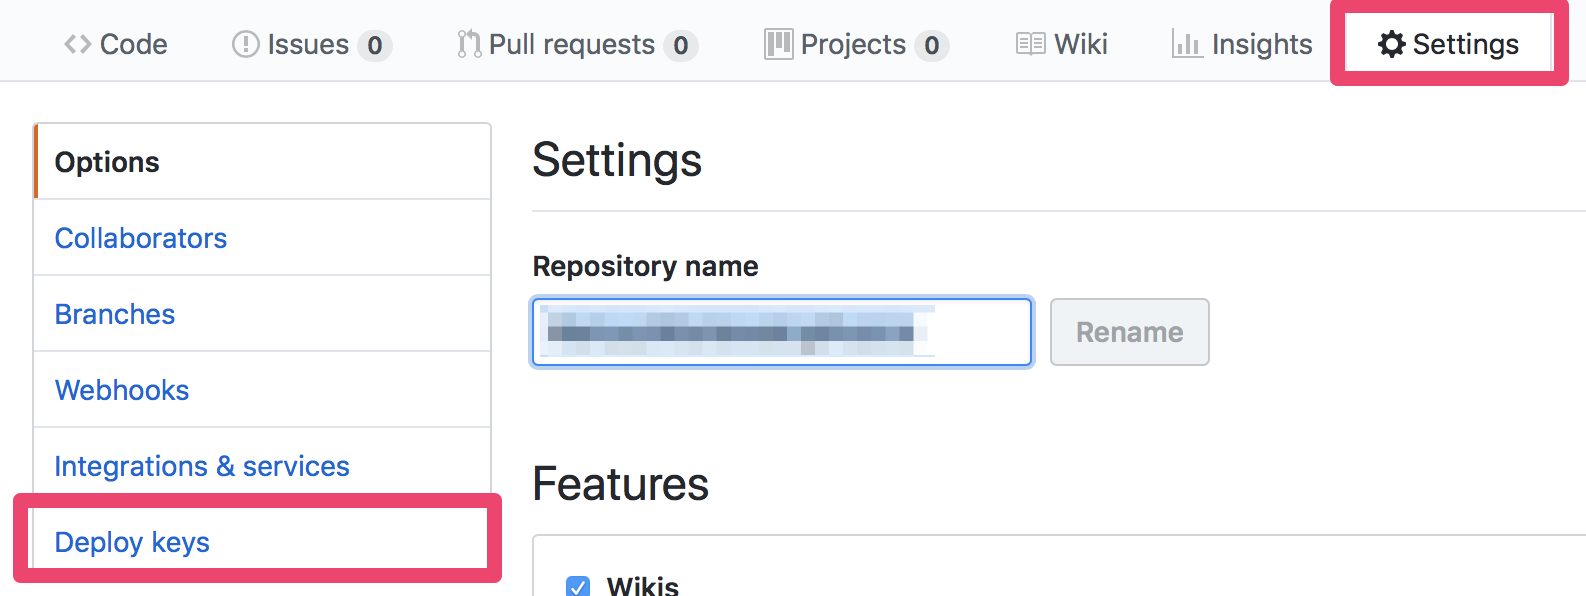
Go into repository Settings and then to Deploy keys.
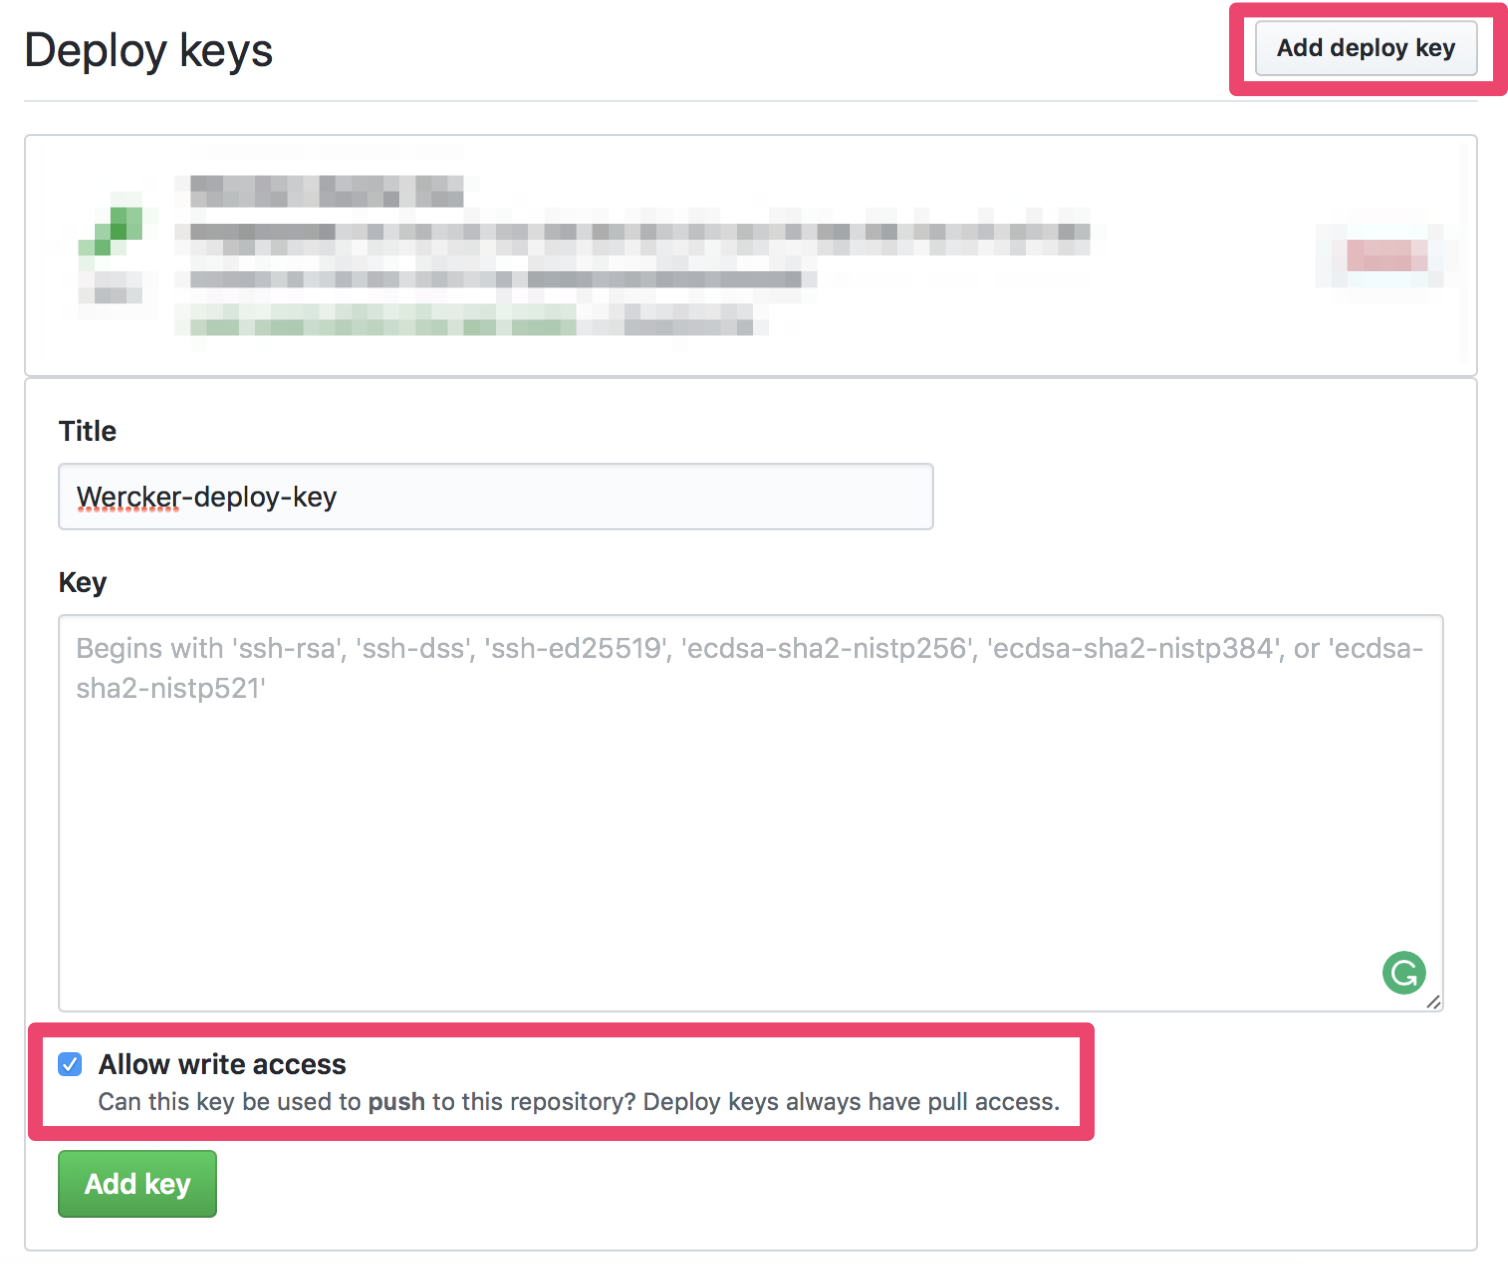
Add a new deploy key – you can name it however you want, I used wercker-deploy-key so I can remember later what it was created for.
Remember to check Allow write access box so Wercker can push to this repository. Into Key field paste the value of SSH_DEPLOY_PUBLIC key you copied from Wercker website.
Let’s get back to our wercker.yml config file.
deploy:
  steps:
    - add-ssh-key:
        keyname: SSH_DEPLOY
        host: github.com
    - add-to-known_hosts:
        hostname: github.com
        fingerprint: 16:27:ac:a5:76:28:2d:36:63:1b:56:4d:eb:df:a6:48
    - leipert/git-push@0.7.6:
         host: github.com
         repo: username/username.github.io
         branch: master
         basedir: .
We have 3 steps in here:
- Adding an SSH key that will be used to push to your repo. We already created this key and added it to GitHub repository settings, so Wercker will be able to use it for pushing your website;
- Add to known hosts so Wercker environment will trust
github.comhost - Git-push (also on GitHub). All you have to do is replace
usernamewith your actual username on GitHub. In my case this step looks like this:
    - leipert/git-push@0.7.6:
         host: github.com
         repo: MariuszWisniewski/MariuszWisniewski.github.io
         branch: master
         basedir: .
Summary
That’s it!
Now you can push a new commit to the repository where you host source code for your website (the one you linked in the Add Wercker app step).
Each new commit to this repo will build your website using the script provided in build pipeline and will push it to GitHub Pages repository using deploy pipeline.
Let me know if you have any questions. In case of doubts, feel free to leave a comment!